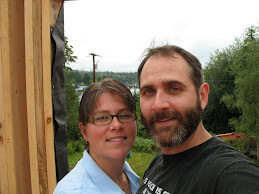
Wow - it's been a long time since we've updated the blog! That doesn't mean that we haven't been still working on things around the house though....
Spring was lovely! It was nice to have my dad (John) out for a visit in March. The weather was sunny & warm for a few weeks & then we got hit with the spring rains. Much needed as we were running a bit dry!!
The birds have all returned - including this pileated woodpecker who seems to enjoy ripping apart the logs lying on the hillside beside the house. Noisy birds...

March was also the perfect time to construct some raised garden beds up on the hillside (this is the west side of the house). It was interesting to make note of the sunshine as it moved across the property. We are not lacking in quantity of sunshine hours here!!
I am almost obsessed with gardening this year. I started my seedlings much too early this year - first week of March saw me planting up a bunch & then in weekly installments til I had a garden growing in the house!

I wanted to start off small this year, so we only built 3 long beds & 1 rather square-ish bed that still needs to be filled. I have kale, radishes, beans & snow peas in the back bed. The middle bed is another veggie bed with shallots, beets, carrots, beans, onions & salad mix. The shallow bed in the front is my herb bed which will be much more accessible once the stairs to the upper deck are built (will explain that one later). There is supposed to be onions, dill, marjoram, anise, sorrel, savory, parsley, thyme, chamomile & sweet cicely in there, but a cat keeps coming along & doing its' business in the bed & killing things...grrrr.

As you can see, things have greened up quite nicely in the last 2 months! I've got goose berry & currant bushes (where the little white patches are - that's just shredded paper used as mulch). The sawdust strip is raspberries that were transplanted back in February. We also moved the compost tumbler up to the back corner as it will be easier to fill & monitor from this spot (again, once the stairs are built).
April was pretty busy for the both of us with working every where else but on our own house. Plus it rained alot. We were lucky to have Phil's dad, Norm & Rosemary & Louis come out for a short weekend visit. The boys helped clear out back behind the house - store the wood in the shelter so that we could have a drainage ditch dug to help move the water properly away from the house.
May saw the start of new projects. #1: building stairs to the upper deck (which had

no outside access) We've lost the photos that show the hillside being excavated & tonnes of wonderful top soil being piled up in front of the house. This is happening on the west side of the house. The stairs will be L-shaped with a landing in the middle & goes up to the upper west door - our proper entrance. Phil had some help designing the 'Master Plan' & ordered all the wood & cement. He poured the first 2 footings & then started another project.....

Project #2: tiling the upper bathroom floor (our bathroom). May was perfect for this since we didn't have a renter in the suite. We dismantled the bathroom & moved everything down to the suite bathroom.
We needed to lay down some plywood to help stabilize the floor & make a level surface for the in-floor heating to go onto.

The tile we picked out is slate with a wonderful assortment of colours & textures. Red, rusts, oxide greens, golds, hints of blue & black. The design of the tile is the most difficult part - we had to purchase porcelain tile to go where the feet for our claw foot tub will be resting (that will be another project maybe this fall), as the slate would shattered under the weight of the tub. The tub is going to be installed to the right of the sink & the porcelain tiles are the oranger coloured ones.

With the design figured out & drawn up on grid paper (showing the number of tiles that would need to be cut), Phil laid down the wire in-floor heating. This is a different system than the heat mat that we've seen installed elsewhere, but the space we wanted heated was a difficult one to have a mat cut for (would have cost too much to custom make the mat).
On top of this wire a layer of thin set was applied & dried for ~36 hours.

Then we (well, Phil..) started laying in the tile on top of another layer of thin set. The little while things are plastic spacers to ensure even work & allow grout to fit in between the tiles later on. This was the part where we actually figured out which colour of tile went where - I had to work elsewhere during this stage, but I had sorted out all the tiles into different colour groups to help Phil out.

This is the floor with the tile freshly laid down. We now wait ~36 hours for the thin set to dry before moving on to the next step. I was able to get into the bathroom to wash down the tiles before applying the first coat of sealer. That needs to dry for a couple of hours & then Phil was able to begin grouting.

We were fortunate that someone in town had a few extra bags of grout - 1 was grey & the other 2 were terracotta. We decided to go with the terracotta colour as it would help bring out
the reds in the slate. Still kinda look like baby poo...

I'm glad I was on hand to help Phil out with this part of the project. the grout took only about 1 hour to put on - as you can see, it was put on EVERYTHING! While Phil concentrated on getting the grout in between each tile & along the walls, I waited 15 minutes & then started to wash the grout off the surface of the tile. Very dirty work & very time consuming. those DIY videos we watched didn't show the job as it actually really happens!! It took us 3 hours to remove the grout from the tile surface with one person running a bucket brigade the entire time! As soon as the bucket of water gets dirty, we dumped it outside & filled it up only to find the 2nd bucket already dirty & needing to be changed out. The grout was difficult to remove, not only because it was drying so quickly, but because slate is very textured - has ridges & nooks & crannies for the grout to get into. A toothbrush is a mighty fine tool!

Here is a close-up of the tile with the grout freshly laid.

This is the floor freshly washed & waiting for sealer. We wanted to wait as long as possible before applying coats of sealer - to allow the grout to cure & things to dry. But we were under a bit of a time constraint. Our new renter was due to move in beginning of June. We found out on the 31st that she wasn't arriving til the following week so we had plenty of breathing room - a few days earlier notice would have been appreciated as we spent some long days working on this!
Now the floor has been washed a few times with a damp rag to remove any dust & 3 more coats of sealer have been applied to the tile surface & the grout. This should protect the slate from flaking off & keep the floor water proof.

This is one of my favourite tiles with green in it. It's now finished & today I moved us back into the bathroom. Phil just finished adjusting the toilet & I had to hem up the shower curtain as it was too long with the new floor. We will finish sanding the bottom of the door so that can be rehung & then Phil just needs to find a nice piece of finishing wood to go at the entrance of the bathroom so we don't bang our toes on the raised floor.
We should begin (again) the stairs project in the next day or 2 by pouring the cement for the last 2 posts. Will try to keep track of those photos better.
 So, you can see here that our footings are all at different heights & they actually look a little cock-eyed - but it was all to the 'Master Plan'.
 The 6 x 6 posts were tricky to level out to each other in order to keep to the square - which actually isn't a square at all. There was one brief heart-stopping moment when Phil thought we had poured the footings the wrong way (meaning the long side was on the wrong side), but after consulting the 'Master Plan' he saw that everything was ok. The notches in the posts are in preparation for the landing frame. This picture was taken from the upper deck where the upper stairs will come to. It looks like we are installing an elevator to the upper deck - it might have been easier than building the stairs!!

 Here is Mike - our 'Master Plan' designer. He came to help figure out the stair stringers - those angles are tricky to get accurately cut & Mike is quite good with the math behind the carpentry.
 Phil hates pouring concrete. But there is always another job that needs it. We needed a pad at the bottom of the lower stairs & this is one big concrete pad! Phil had brought in a huge sack of navvy-jack & mixed up his own concrete (in the wheelbarrow) but we ran out just before the end....he ran to the builder's supply store here in town & got another 8 bags of redi-mix concrete & that was just enough to finish. Funny thing - the pad slopes a little to the front lower corner - no amount of leveling prior to pouring was going to fix that....at least the water will drain away from the stairs!!
 The lower stairs are almost long enough to be a separate staircase in itself! I didn't realize how high up the deck was until we started to use the new stairs - lots of steps to climb. But they are nice & wide so we can get up appliances or furniture or big totes of groceries.... Much nicer than the narrow stairs we had previously been using inside the house.
 We are installing the railing spindles today to ensure no little monsters fall off the stairs. The 'bridge' to the gardens is just temporary, but it will do for the summer til we can figure out a more permanent fixture. The railings still need a cedar cap so you can slide your hand up/down while climbing & I'm sure we have that wood in the storage shed somewhere.
 Well, the house just seems to keep getting bigger & bigger whenever I look at it from the road...I had hoped that the stairs would make the house look less tall & widen it out. I don't think that happened....